Instructions for Installing SuiteCRM

Since we have discovered the documentation for SuiteCRM to be a bit sparse and had to figure out a few steps for installation on our own through trial-and-error, we thought a step-by-step guide to an installation might be useful to the general public.
If you are not familiar with SuiteCRM, it has evolved from the open source version of SugarCRM. While similar in many ways, it is no longer supported by SugarCRM and instead is managed by the community.
It can make for a nice, free version of a Cloud-based CRM system that you can host yourself with multiple users distributed in different places and with considerable customization available.
In this case, we will be installing SuiteCRM version 7.12.7 (should be the same for other 7.n.n versions), along with Apache2 as the Web server, MariaDB as the database, and PHP as this is what SuiteCRM is built on (not necessary to know unless you are doing significant levels of customization).
First, a new EC2 instance of Linux must be created on AWS. In this example, we are using Ubuntu v20.
Once you are on the command line of the instance via SSH or equivalent, run the following two commands to update the installed packages on this instance:
$ sudo apt update

                    $ sudo apt upgrade
Next, we want to install Apache Web server and get it running.
                    $ sudo apt install apache2

                    $ sudo systemctl enable apache2

                    $ sudo systemctl start apache2
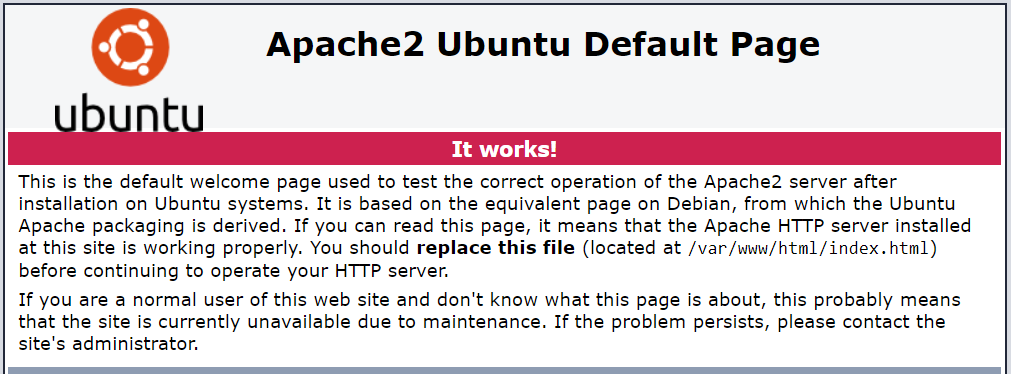
At this point, we should be able to test the installation and access the Web server by IP address from your browser. Go to your browser, enter the public IP address of your AWS instance, and you should see the Apache server page. If you do not, don't go any further until you can see it. If you can not see the server page, be sure you have set up your AWS security group to make port 80 public. This allows for http traffic from the Web.

*** Check out our Individual Name Match Scoring API
Next, we will install PHP and many of its components.
$ sudo apt install php php-cli php-common php-curl php-mbstring php-gd php-mysql php-soap php-xml php-imap php-intl php-opcache php-json php-zip
Next, we will install MariaDB, a fork of MySQL, that will serve as the SuiteCRM database.
$ sudo apt install mariadb-server
Now let's ensure MariaDB is running ok.
$ sudo systemctl status mariadb
Let's go into MariaDB for some setup (password is blank).
$ sudo mysql -u root -p
Enter the following to create the database instance within MariaDB where SuiteCRM will store its data. Keep whatever value you choose to use for your-db-user-name below, as you will need it when you set up SuiteCRM in the browser a few steps from now.
                    $ MariaDB [(none)]> CREATE DATABASE suitecrmdb;

                    $ MariaDB [(none)]> GRANT ALL PRIVILEGES ON suitecrmdb.* TO 'suitecrm'@'localhost' IDENTIFIED BY 'your-db-user-name';


                    $ MariaDB [(none)]> FLUSH PRIVILEGES;

                    $ MariaDB [(none)]> EXIT;
Next, we will download the SuiteCRM files that run the CRM system.
$ wget https://suitecrm.com/files/147/SuiteCRM-7.12/630/SuiteCRM-7.12.7.zip
Let's make sure the Linux unzip utility is installed.
$ sudo apt install unzip
And then we can unzip the SuiteCRM files
$ sudo unzip SuiteCRM-7.12.7.zip -d /var/www/html
At this point, it is wise to change the name of the SuiteCRM-7.12.7 directory to the generic SuiteCRM for ongoing simplicity. Go to the directory that you unzipped SuiteCRM into, /var/www/html. From that location, type the following:
$ sudo mv SuiteCRM-7.12.7 SuiteCRM
Next, we need to set the required Linux permissions. First, go into the SuiteCRM directory.
$ cd SuiteCRM
And then enter the following commands.
                $ sudo chown -R www-data:www-data .

                $ sudo chmod -R 755 .

                $ sudo chmod -R 775 cache custom modules themes data upload

                $ sudo chmod 775 config_override.php 2>/dev/null
Now we are ready to go to the browser and complete the SuiteCRM setup.
*** Check out our other data-oriented APIs for better data within your CRM system or anywhere else.
Go to your browser and enter the following. You should see the SuiteCRM setup/install screen.
http://YOUR-AWS-INSTANCE-IP-ADDRESS/SuiteCRM/install.php
You should see 'Welcome to the SuiteCRM 7.12.7 Setup Wizard' and have the opportunity to agree to the License Agreement. Then, click 'Next'. You will then see some default system environment information. Click 'Next'.
You will then have the opportunity to configure the database and the application. For Database Name, enter "suitecrmdb". The Hostname should be the IP address of your AWS instance. Enter "SuiteCRM" for the User since we set this up earlier and use the Admin password. For the site configuration, you will need to provide a password for the Admin user. Provide an email address for the Admin user as well.
Finally, enter the following URL of your SuiteCRM instance into your browser to run SuiteCRM.
http://YOUR-AWS-INSTANCE-IP-ADDRESS/SuiteCRM
You will be prompted for your Username and Password. Use the Admin credentials you set up in the previous step.
And that's it! You are up and running. At this point you can begin entering contacts, or you can also use the import facilities within SuiteCRM to bring data in from elsewhere.
AI Interactive Data Client: Request and Receive Structured Data of Any Kind on Any Subject.
More...
Github Code Examples
More...
Generate your own Datasets: Retrieve Customized, Real-World Data on Demand as Defined by You
More...
High-Performance Batch Processing: Call our APIs with Text Files as Input.
More...
Try our Pay-as-you-Go Option
More...
Available in the AWS Marketplace.
More...
Free Trial Usage Credits
Check out our full list of AI-powered APIs
More...
Documentation and Overview
More...
Product Newsletter
More...